top of page


For those who are playing the game, I have decided to add a Walkthrough Guide. This game was intended to allow the player to decide where and when they want to do things. The Town is open for exploration although some areas may require progression in the storyline to fully unlock. The following Walkthrough is just how I, the creator, play through the game. You can play and do whatever you want.
PC Controls:
Space = Enter/Select
Esc = Cancel/Menu
Arrow Keys = Up, Down, Left, Right
Z = Run
.
Walkthrough 49: Undercover HB
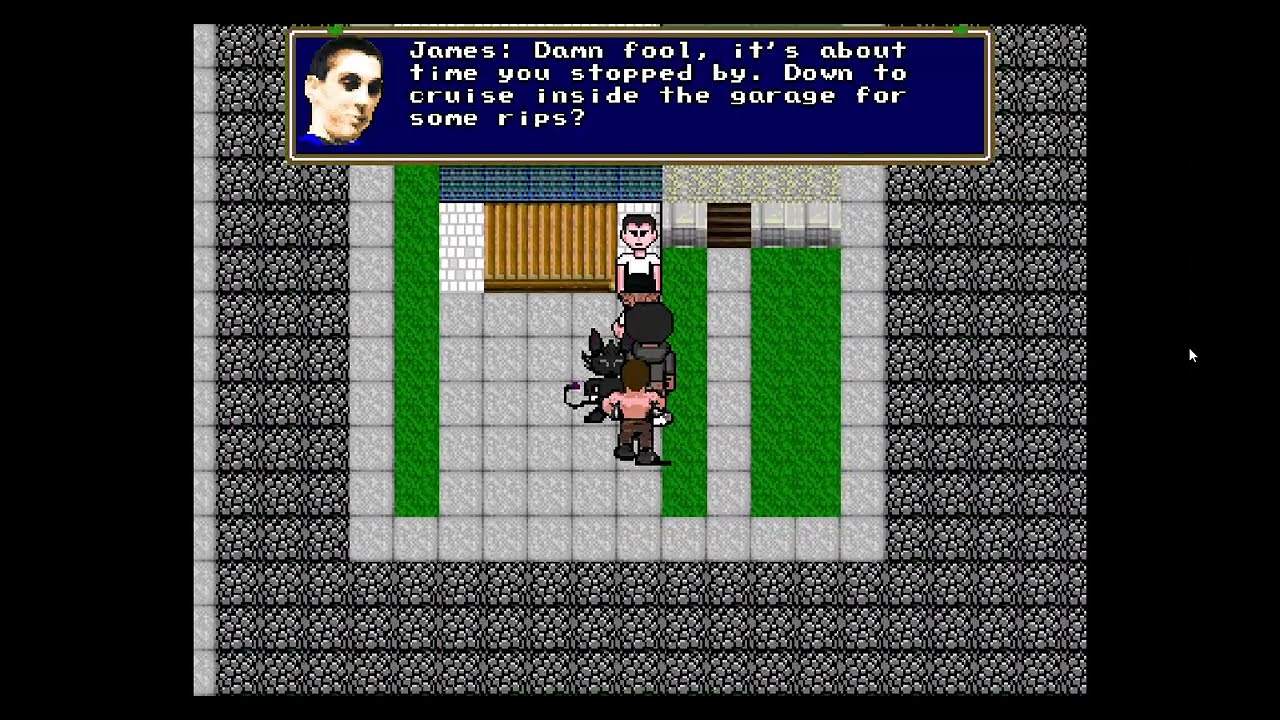
This mission starts at James' garage. Head over to James' house (up the street from Roach's house.) If you haven't met James at his house yet he will be standing outside and invite you in the garage to smoke. James tells you some of the backstory on HB and their lead Kody. It turns out James and Kody used to be friends before Kody got greedy. James eventually asks you to do a quest for him. He asks you to disguise yourself as an HB gang member and deliver a package to a rich

Dankerfader

Walkthrough 48: How to unlock Cait Sith
In order to start this quest you will need Catnip. The easiest way to get catnip is to buy it from the South bay Store at the end of Redondo Beach Pier. Head to the pier and the south bay store is past the hot dog on a stick and Tonys. Once you have your catnip head to Palos Verdes. If you have unlocked the Palos Verdes mansion and the Wave Bus app, you can fast travel to the PV home as the quickest way to get there. From the PV Home head north along the road. Turn East on th
Dankerfader
Walkthrough 47: Home Improvements Part 2
This quest begins at your home after completing the beach cities painting work for your Dad. Make sure you have full HP, MP etc. There are two back to back boss fights. Start the quest by talking to Dad in the office/guest room at home. He will tell you how one of his wealthy clients ripped him off on job payment. Make sure you talk to Mom in the kitchen before you leave. Go outside and use the wave app to travel to PV gate. You cannot enter PV from the gate due to a security
Dankerfader

Walkthrough 46: Home Improvements Part 1
For the next important quest you will need access to Palos Verdes. Unfortunately the guards at the front gate won't let you into this private luxury community. Don't worry there is a way around it. Head to Hermosa Beach. Specifically the hardware store Learned Lumber. Defeat any lingering HB goons standing near the entrance. You may have already handled them on an early mission. Find Al Borlan with his construction hat. He will offer you a special deal for defeating the HB go
Dankerfader

Walkthrough 45: South Bay Painter
You start this mission at home talking to Dad. He will ask if you want to earn some extra money helping paint houses. The first house is in Manhattan Beach South East of the pier. Return home to learn about the next job. Talk to Fitzy to start the job. The second house is in Hermosa South of the pier. Return home to learn about the last job. The third house is next to the first house in Manhattan Beach. West of the first job. Return home to start part 2.
Dankerfader

Walkthrough 44: The High school Heist part 2
Once you are in the tunnels travel east. Head North at the dead end. Then West at the first passage. Follow the tunnel West to the first South path and then head south. The room with the electric breakers is the place you are looking for. Walk up to the weed logo on the floor. You will cut a hole in the ceiling and setup a ladder to sneak into the security closet. Head up the ladder. In the closet make sure to grab everything. Once you grab Roach's skate shield Lorenzo the se
Dankerfader

Walkthrough 43: The High School Heist Part 1
The Heist begins in Roach's basement in North Redondo. After starting the heist, head over to the Pitcher House in Redondo Beach to meet with Roach. You will find Roach laying on the floor drunk. You will have to do the job without him. Head over to Redondo High, the security guards are no longer blocking the entrance. Once inside the school head over to the Science Building at the North West corner of the map. The ASB office with the maintenance tunnel keys is on the 2nd flo
Dankerfader
Walkthrough 42: The High School Heist Helper
You start this quest after meeting with Roach at his basement hideout. Roach introduces you to James who fills you in on the heist plan. The local high school security has a storage room where they keep everything they confiscated from students. This includes Roach's prized skate shield. James and Roach need your help with the heist but first you need to do a bit of setup work. Part 1 Fireworks Go with Roach to the Teen center to collect fireworks from his cholo cousin. Head
Dankerfader

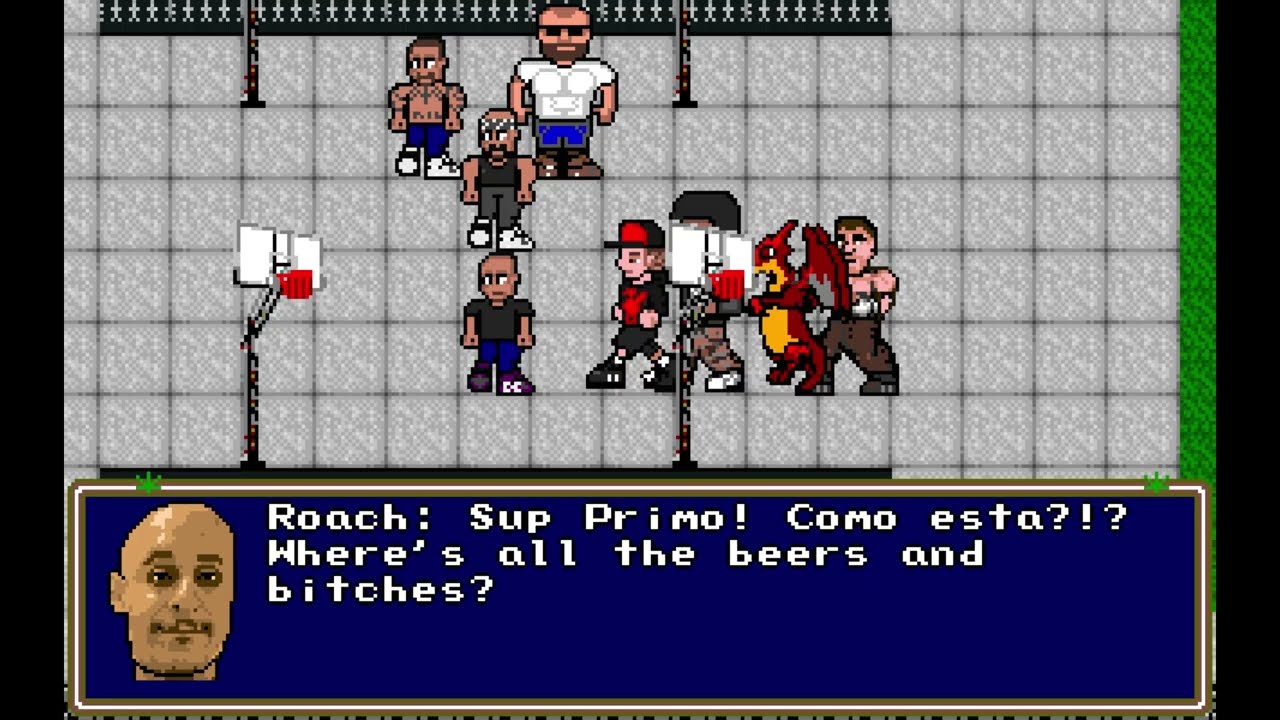
Walkthrough 41: Roach
Continuing on from the last walkthrough, a random guy named Roach has invited you to come to his house to discuss a job he has for you and your crew. You basically want to walk East from the Hermosa Pier to the North Redondo Entrance near ET Surf. Roach's house is right on the inside of North Redondo from that entrance. Once you spot Roach he will invite you down into his secret underground basement where he's working on his plans. He wants to break into a secret stash of con
Dankerfader

Walkthrough 40: Mad Matt and Big Reece
Now that you have done a few side quests it's time to get back on track with the main story and clearing out the H.B. gang. Make sure you have lots of food, plenty of nugs for bong rips, and decent equipment for everyone in the party. Head over to Hermosa Pier. From home you want to head north to 190th street. Then West till you see the Redondo sign. Then Head north again. In Hermosa keep heading North till you read city hall. You will see a large street and a bus stop. Now h
Dankerfader

Walkthrough 39: Rock and Roll
You start this mission in Carson at the south end of the city near the bus. Our friend the Bus Commissioner from a few missions back has a new problem he needs you to solve. The tunnel that goes between Carson and the beach cities is blocked by rocks. Someone needs to go into the tunnel and clear the rocks. Unfortunately, you need a special Golden Pickaxe to break the rocks. The Golden Pickaxe is sold in the area north of Carson called Hell Marsh. You head north from Carson c
Dankerfader

Walkthrough 38: How to Unlock Carbuncle
You will start off this quest in the South East Corner of Redondo Beach near the Church at the end of PCH. This is the entrance to Torrance Forest. In Torrance Forest you want to head to the North East Corner of the map. To get there you want to keep heading North East as much as possible from the entrance. Torrance Forest is a great place for gathering cooking ingredients. You can fight numerous different meat dropping creatures. There are also lots of different vegetables y
Dankerfader

Walkthrough 37: The Wheels on the Bus
This is a fairly simple side quest you can do to unlock a form of fast travel in the south bay called "The Wave" also known as the local bus. You have to head to the bus station in North Redondo to start the quest. The entrance to North Redondo from Redondo is located in the upper northeast corner of the map. From there you want to head to the Northwest corner of North Redondo. There will be a bunch of buses outside. A bus driver will tell you the Bus Commissioner has been ki
Dankerfader

Walkthrough 36: Alley Spot Ambush
Lucky and Jacob head over to the alley behind (east) of the hospital. In the trees is Lucky's childhood club house still intact. Lucky meets with Griffin before their smoke out turns into an ambush from the local gang HB. After defeating HB, Griffin agrees to join your party.
Dankerfader
Walkthrough 35: The Pitcher House
Lucky's dad tells Lucky to forget about Toker and the Blaze Knights. Toker's last instructions mentioned a friend at the local bar the Pitcher House. Unfortunately, the Pitcher house has been taken over by the local gang HB. Lucky has a quick chat with Lucky's uncle Fitzy who tells Lucky his father has been getting extorted by HB. They are threatening the local business owners and Lucky's dad was one of them. Lucky heads straight to the Pitcher House to confront HB. He quickl
Dankerfader

Walkthrough 34: Going Home
Lucky and Jacob escape Amethyst town on the train. The engage in a bit of conversation while riding on the train. Nothing too eventful. Lucky and Jacob arrive in Redondo Beach. Outside the train station Lucky sees a familiar face. His Dad's best friend and business partner Uncle Fitzy. Uncle Fitzy gives the boys a ride to Lucky's parent's house. Once inside Lucky reunites with his mom. She tells him to go down to the docks and tell his dad he is home. Basically you want to ex
Dankerfader

Walkthrough 33: Part 2 Getaways and Goodbyes
After defeating the Swat PIGS in the sewer it's time to head west towards the exit. Toker stands awaiting you in a narrow pathway. Suddenly a shadowy figure appears behind you in the sewer. Can it be the Red headed menace from Lucky's hallucination in the forest? Toker instructs Lucky to keep going while he fights the Red headed villain. Lucky refuses at first but Toker insists the future is dependent on Lucky escaping. He tells him to head to the train station and take the t
Dankerfader

Walkthrough 33: Part 1 Bud room Blitz
After months and months of hard work, the day to harvest your plants has finally arrived. Lets get ahead of the game and go down to the blacksmith and buy some trimming equipment. The more expensive trimming equipment will lead to better yields and gaining extra dimes and dubs per trim. Once you have your trimming equipment equipped Toker's dialogue will change outside the grow room. He needs your help to trim the plants. You need grow equipment blah blah. All of a sudden Nur
Dankerfader

Walkthrough 32: Part 2 Burning Bush
After defeating Joey's dog, Lucky and Jacob discover the outdoor grow op. By clicking the bottles of alcohol near the fire pit you can start a fire in the fire pit. Click the fire pit and then walk over to the weed plants. You will be given the option to set them on fire. After setting all the plants on fire Lucky needs to escape. Joey stands in the way. He says once he kills Lucky and Jacob, he is going to take over the mansion grow op. Lucky and Jacob battle Joey. Joey runs
Dankerfader

Walkthrough 32: Part 1 Search and Destroy
The thief formerly known as Boogers revealed to Lucky that Bob had a map detailing the location of his secret outdoor grow op. Lucky heads over to Bob's house and steals the map. Lucky meets up with Toker back at the mansion to discuss their next move. Toker tells Lucky to track down the hidden grow op and burn it to the ground. Using the map Lucky finds the grow ops secret entrance through a hidden passage. Once inside the woods Lucky can hear the familiar and unfriendly bar
Dankerfader

Walkthrough 31: Boogers
Lucky returns to the grow op to find Emily waiting by the door. She tells Lucky that Dollar Bill Bob has come by the grow op looking for Lucky. He requests Lucky meet him at Joey Scarface's apartment. When Lucky arrives at Joey's apartment, he finds an ambush waiting for him. Bob tells Lucky he knows all about the grow op and Lucky being the new owner. From now on Lucky must give Bob and Joey all the weed he grows or they will kill him and his friends and take over the grow o
Dankerfader

Walkthrough 30: How to Unlock Squirt
recommend having unlocked Sprout before attempting to fight Squirt. These battles are difficult if you do not use the right summon. For those who do not understand elemental weakness and need a hint. Torch (fire) weak to Squirt (water) strong to Sprout (earth) Squirt (water) weak to Sprout (earth) strong to Torch (fire) Sprout (earth) weak to Torch (fire) strong to Squirt (water) Start off by inspecting a book in the living room area at the grow op mansion. Jacob will ask you
Dankerfader

Walkthrough 29: How to Unlock Sprout
Once Amethyst Woods is opened up and you have a hatchet, you will be able to unlock the summon Sprout, assuming you did not choose Sprout to begin with. If you selected Sprout, you will be able to unlock Torch instead. Head to Amethyst Woods. There is a cave blocked by trees just west of the stables. Equip your hatchet to cut down the trees. Don't forget to change your weapon back to your normal weapon. Enter the cave and take the right path. Keep heading North and East when
Dankerfader

Walkthrough 28: The Need for Seed
You were able to fix the plumbing for water. You stole bulbs for the lights. You even got secret special soil. Now all you need is love. Just kidding you need seeds. Toker tells Lucky about a secret stash of confiscated seeds in the Pigs supply station near the train. Lucky heads over to the supply station. Soon he discovers the Pigs use the station to be lazy and take naps on duty. They don't appreciate Lucky disturbing them and attack. After beating the Lazy Pigs, Lucky sea
Dankerfader

Walkthrough 27: Date Night
This walkthrough does not have anything to do with the main story. This is just a side quest that lets you bang Nurse Emily. Start off by talking to her in the Grow Op Mansion in Amethyst Town. She will tell you to meet her in the cafe. At the Cafe, she will tell you she likes sweets. Go to Chef Boyardee behind the counter and buy a cupcake. Go talk to Emily again and it will start the cutscene for date night.
Dankerfader

Walkthrough 26: The Race
I really should not have to explain this video too much. After you tame Aithon the flaming horse at the Ponita ranch north of Canna Canyon, you will be eligible to race in the big event. Talk to the owner of the ranch and he will offer you the chance to enter the race for fifty bucks. This is the first race and it's very easy. Just stay inside the cones and don't bump your opponents. The prize for the race is Aithon the ponita and a free stable to use at the ranch. Once you g
Dankerfader

Walkthrough 25: Aithon
After you unlock ponita riding you will be eligible to unlock your own ponita and stable. First off grab a rental ponita in Amethyst town. Once in Amethyst woods travel along the dirt path north to Cannabis Canyon. In Cannabis Canyon head north in between the various mountains to the Ponita Ranch. You will find Aithon near the barn in a pen alone. Talk to the woman next to his pen. She will tell you how no one is able to ride or tame the horse. Head over to the blond woman wo
Dankerfader

Walkthrough 24: Horsing Around
This is an important side quest because it will unlock Ponita (horse) riding and animal riding in general. Ponitas are like mini horses that come in different colors and patterns. Riding animals is handy for traversing wild areas where skateboards and vehicles cannot go. Eventually you can unlock your own stable and various animals to call upon and ride. You start this mission at the Amethyst town stables. Go inside and talk to the owner who looks like a cowboy. He will offer
Dankerfader

Walkthrough 23: Chef's Special
Once you have opened up the secret route into Amethyst woods, a number of new side quests in town become available. So let's take a break from the grow op setup to do a few important side quests. Chef Ramsey needs help cooking Thanksgiving Dinner. Your first mission is to hunt down a wild turkey in Amethyst woods. The turkey is usually found near the main road leading into town. It can sometimes be found slightly south of the road. Once you kill the turkey head back to Amethy
Dankerfader

Walkthrough 22: Super Soil Brothers
After collecting the light bulbs needed for the grow op, Toker tasks Lucky and Jacob with gathering some special soil found in Amethyst Woods. There is just one problem. The Pigs are not letting anyone out of the city into the woods. Toker tells Lucky there is a secret trail leading to the woods. They just need to find a way to trim some overgrown bushes. The path is in the NW corner of the Amethyst Town. Once you check out the path, head to the blacksmith. Buy a hatchet used
Dankerfader

Walkthrough 21: Let there be lights
Lucky is tasked with acquiring special light bulbs to get the grow op up and running. Toker mentions the school uses the same bulbs and Lucky might be able to find some in a utility closet. Lucky and Jacob adventure back into the burned school. Once in the school you want to head into the closest classroom door. Walk around the desks to get to the East side of the room and walk through a hole to the other classroom. Walk around more desks and head out the East classroom's doo
Dankerfader

Walkthrough 20: The Waterboy
There is a secret hatch that leads to the sewers. It can be found by using the computer in the grow room. Lucky and Jacob head down into the sewers through a secret hatch in the grow op. Once you enter the sewer hug the East wall and head south until you reach a mining spot. Then head west. There will be a small bridge West leading to a platform and another bridge going North. You should see a giant Alligator coming your way. After some exploring, they come face to face with
Dankerfader

Walkthrough 19: The Meeting
This video/walkthrough is mainly just cutscenes and talking to NPCs. Basically after gaining ownership of the grow op, You have to go tell Toker in the sewer and then everyone meets up at the grow op to discuss their plans. Nurse Emily joins them. Apparently the grow op was damaged by Ray as he left and will require a few missions to get things fixed.
Dankerfader

Walkthrough 18: The Grow op Part 2
After defeating Ray's henchmen "The Twins" Lucky heads down to the grow op in the basement. After wandering around the grow room, Lucky confronts Ray. This is a two part fight. First you will fight Ray's mutant weed plant monster. Then you fight Ray. Make sure you conserve Jacob and Emily's MP knowing you have the second fight against Ray.
Dankerfader

Walkthrough 18: The Grow Op Part 1
In the last walkthrough, the evil Boss Ray ordered his cholo thugs to kidnap Nurse Emily and take her to his mansion. The only way into the Mansion is offering to trade a weed clone for the mansions secret grow op. Lucky and Jacob head to the mansion in Amethyst Town. They show the clone they acquired from Toker to a guard watching from the security cameras and they are let inside. You fight with the guard and then you are free to wander the grow op. You want to head to the n
Dankerfader
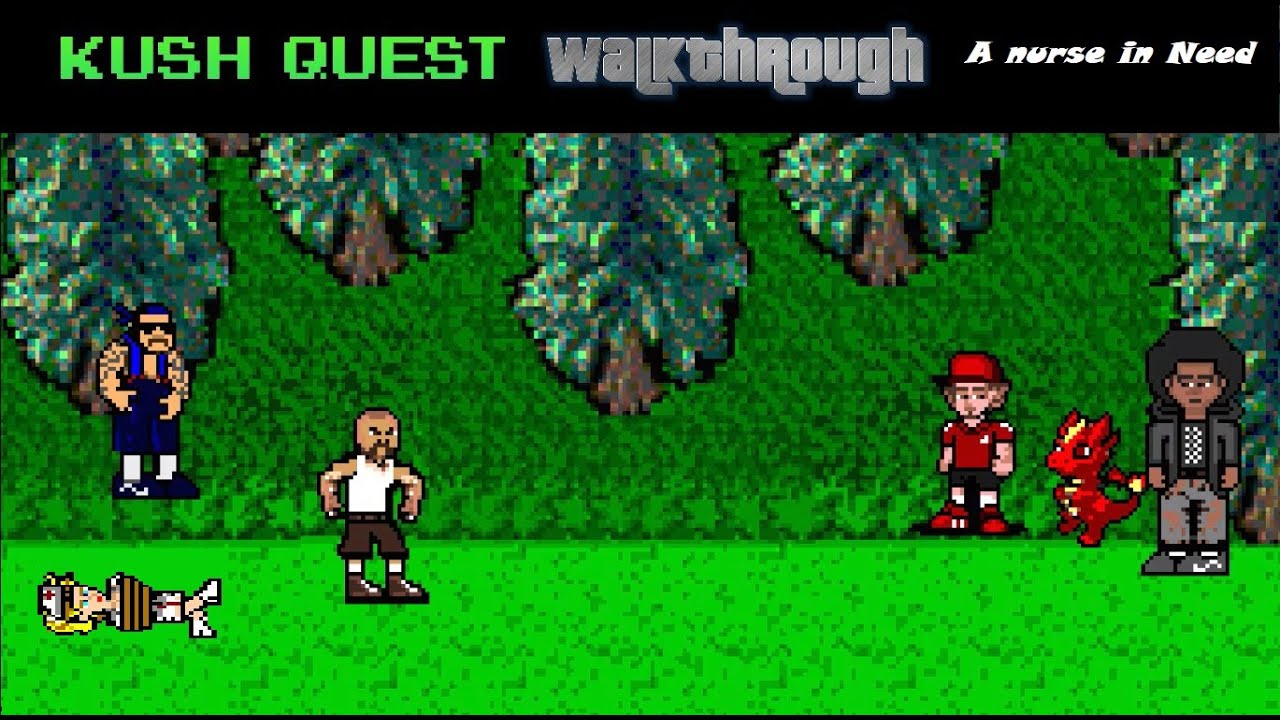
Walkthrough 17: A Nurse in Need
The video starts off recapping what happened with Nurse Emily. She was kidnapped by the local drug dealer gang. Lucky is told by one of the other nurses a lead in town. A local plumber who has been inside the dealer's home base. Lucky goes to the plumber's house and after some talking he convinces the plumber to tell him about the dealers. The dealers have a grow op in the local mansion in town. Their boss, a shadowy figure called Boss Ray, is desperate for new genetics for h
Dankerfader

Walkthrough 16: Med Man
Lucky meets up with his Nurse friend at the local hospital. She needs help providing weed to her medical marijuana patients. Lucky is tasked with delivering sacks to several town residents secretly. His first patient is Adam outside the local cafe. Adam has trouble stimulating his appetite. Next Lucky brings some bud to the desk of a local businesswoman working at city hall. He stashes the weed in her desk and finds the money waiting for him. Lucky also has to provide cannabi
Dankerfader

Walkthrough 15: Gardeners and Blacksmiths
Lucky and Jacob continue their search for Toker's lost growing manual. They meet with Joey who informs them he sold the book to the school's gardener. Lucky and Jacob head to the school groundskeepers shed on campus. No one is home but obviously the groundskeeper has tried a few tricks from the book because the room is overgrown with wild plants. After a kick battle with the monster plants, Lucky finds the grow manual and heads back to Toker. Toker informs them they need to f
Dankerfader

Walkthrough 14: Hospital Bill Bob
Lucky is asked to investigate the whereabouts of Toker's old gardening book. Lucky's first stop is Joey Scarface's apartment. Joey tells Lucky that Bob has been jumped by the rival weed dealers in town. Bob is requesting Lucky visit him in the hospital. Lucky goes to the hospital to find Bob in bed. He asks Lucky to run his business while he is recovering. Lucky agrees and his first task is meeting Bob's weed source at the train station. At the train station the rival dealers
Dankerfader

Walkthrough 13: When Jacob met Toker
This video is mostly just dialogue, but I will summarize it for you. After escaping the school and rescuing Jacob, Lucky and Jacob head back to Toker in the sewers. Toker has heard over the police radio that Lucky set the school on fire. Lucky explains they had to burn down important research that would be used for evil. Jacob tells Toker and Lucky what happened at the academy and why he had to leave. Jacob has the unique ability to absorb and learn other summoner's summons.
Dankerfader

Walkthrough 12: Back to School Night Part 2
As we last left off the story, Lucky was infiltrating the local school with the mission of rescuing a mystery man named Jacob. Lucky opens the door to the library and meets Jacob who is confused about who Lucky is. It doesn't matter though because Lucky has weed and smokes Jacob out which starts their epic friendship. Unfortunately, A Pig storms the door and Lucky and Jacob prepare for battle. This fight can be tough because you don't get a chance to update Jacob's gear from
Dankerfader

Walkthrough 12: Back to School Night Part 1
Toker gave Lucky a quest to break into the local school and help a mysterious person of interest escape. But before we do that there is a small detour I must recommend. Head to the smoke shop and buy a scale. In Kush Quest you use your scale to separate weed into smokable quantities. When you first start out you can only smoke 1 nug at a time so whenever you buy/find a 5 sack or larger you have to use your scale to change it to nugs to be able to smoke it. Why is smoking impo
Dankerfader

Walkthrough 11: Herbal Errand Boy
Despite the last walkthrough ending with Toker giving Lucky a rescue mission at the school, I recommend completing these story quests first as you will need to do a lot of fighting in the next part of the game. Lucky goes over to Joey Scarface's home and Bob has a job for Lucky running a dime bag out to impatient customer. The customer complains the weed is short. Bob later admits it is. Then Lucky reports to Joey who also has some work for Lucky. There's a new drug dealer in
Dankerfader

Walkthrough 10: The Fade
After rescuing Nurse Emily from the sewers, Lucky still needs to meet back up with Toker to return the bong he requested. Lucky heads down to the sewers to give Toker his bong. Toker offers Lucky a bong rip and then proceeds to tell him about the hidden utility room underneath them. This is where he grows his weed. Toker reveals a hidden ladder in his living area. Toker and Lucky head down the ladder. The utility room is lit up by florescent lights. Not the ideal grow lights
Dankerfader

Walkthrough 9: The Damsel in Distress
After meeting with Joey Scarface and retrieving Toker's bong, Lucky heads back towards the well to the sewer. Before he reaches the park, Lucky is approached by the mayor of Amethyst Town. A young woman has fallen through a broke sewer cover and fallen into the waters below. The town needs a hero to go into the sewers and rescue her. Lucky heads into the sewers and hears a woman screaming. (You can't return the bong to Toker without completing the quest to save this woman). L
Dankerfader

Walkthrough 8: Toker's Task
Lucky informs Toker of what happened in the woods outside town and how he came across the plant. Lucky shows him the plant and Toker agrees to take care of it. Toker teaches Lucky about the Blaze Knights and THC. The Blaze Knights are a group of heroes who all gain superhuman abilities from smoking or ingesting weed. They used their cannabis inspired abilities to protect the people of the fire states. They are like Weed Jedis, Muskateers, Knights of the round table and X men
Dankerfader

Walkthrough 7: The Avatar Absorber
Jacob wakes up to find a message written on the bulletin board for students. Study groups have been assigned to the library. Jacob does the usual trek to the library. (I promise this is the last time). Jacob approaches his study group. Issac the academy bully is bored of studying and wants to fight his avatar against someone else. Trixi tells him her avatar is for healing. Jacob tells Issac to shut up and leave the other students alone. Issac decides to turn his focus to Jaco
Dankerfader

Walkthrough 6: Midnight Toker
First off, I spent some time leveling up Lucky to level 8 off camera. I also bought some new gear and farmed some kick ass shoes from a rare monster in the park. Comment and I will post a video guide on finding the monster. Lucky leaves his apartment to find Hector waiting in the doorway to the apartment building. He and the crew have one last painting job in town. Lucky heads over to the job site. Hector says this is the last job in town and him and his family are moving to
Dankerfader

Walkthrough 5: Jacob learns new Trix
Last time we left off Lucky went to sleep and the story has transferred over to Jacob at the Avatar Academy. Jacob is told by his friend Mia that she has been assigned to be his mentor. They meet up in the Avatar Academy Library. Mia tells Jacob in order to progress in his training he must complete the sacred Summoner ritual of eating a magic mushroom. Jacob eats the mushroom and begins to hallucinate. Mentally and visually for our player, He goes to the land of his avatar To
Dankerfader

Walkthrough 4: The Elmo Cholo Eliminator
Jacob discovers his avatar and then the game switches back to Lucky waking up in his bed at home. As he exits, Hector his coworker is right outside the door with another painting job in town. Lucky is also surprised by the landlord. She wants her rent money. Lucky goes over to the landlord's door and pays the rent. After completing another painting job, Lucky travels to the town park where trouble is a foot. A local woman has lost her daughter and needs someone to explore the
Dankerfader
bottom of page